<>
Mouse Settings in Windows
How To Adjust Mouse Settings in Windows
Having noticd that the old Windows properties window has been around for a long time. In Windows 8 and 10, it probably would have been a good idea to move some of those settings into the new Settings app, but of course that didn’t happen. To get anything useful done, you’ll need to dive into the good old-fashioned Control Panel.
Configure the Main Mouse Settings
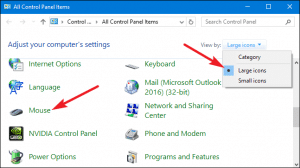
In the upper-right of the “Control Panel” window, change the “View By” dropdown to “Large Icons” to make things much easier to navigate, and then double-click the “Mouse” app.
 Buttons
The “Buttons” tab offers three options, and they’re fairly self-explanatory. “Switch primary and secondary buttons” swaps the left- and right-click functions, which is convenient if you’re using your mouse left-handed.
The “Double-click speed” setting adjusts the gap between clicks for the double-click actions on all Windows files and folders. Set it slow or fast at your preference—less-experienced Windows users tend to prefer a slower click.
The “Click Lock” setting lets you use the click-and-drag function without holding down the default left-click option. Most users won’t want this enabled, but it can be very helpful if your finger or hand is fatigued, or otherwise has trouble holding down the mouse button while dragging.
Pointers
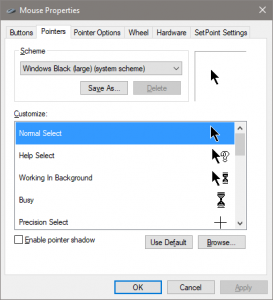
The “Pointers” tab lets you change the look of the mouse pointer and the contextual cursors that accompany it. The various collections of pointers and cursors in the “Scheme” dropdown is what most people want: you can switch to a black or white pointer for better contrast in windows, or make the cursor larger or smaller to suit your vision.
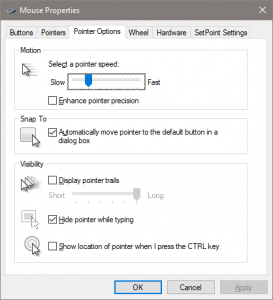
Under the “Customize” list, you can change the individual pointers and cursors within the scheme. Highlight a pointer or contextual tool, click the “Browse” button, and then select an alternate image from the default folder—or a different folder if you’ve downloaded some cool images you want to use instead.
Pointer Options
The “Pointer Options” tab lets you control various settings regarding your on-screen pointer.
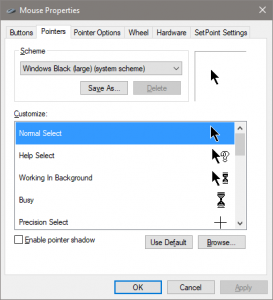
The “Pointer Speed” option in the “Motion” category is probably the most commonly-adjusted setting in this guide. Moving the slider to the left or right makes the cursor move slower or faster, respectively, relative to the physical motion of your mouse.
Mouse Settings in Windows
The “Enhance pointer precision” option is worth special attention. With this option enabled, Windows accelerates the pointer more for faster motions of the mouse, making it possible to use the mouse in a smaller physical space. It’s a useful option—particularly if you’ve got a large monitor—but disabling this option can be helpful for designers and gamers who want more specific control with a one-to-one relationship between hand and mouse motion. For a more complex breakdown of this feature, be sure to check out How-To Geek’s article on Enhance pointer precision.
The “Snap To” option moves your pointer to the default dialog button whenever a new window appears. Many people prefer this setting to be left on because it means moving your mouse less. Some people, however, find it a little disconcerting to have their pointer moved for them.
Mouse Settings in Windows
The options in the “Visibility” group make the pointer more obvious on the screen in various ways. The “Pointer trails” option leaves “after-images” of the pointer while it’s moving, making it easier to track for those with vision difficulties or using a small screen. The “Hide pointer while typing” option is self-explanatory and preferred by most people who do a lot of typing. The last option allows you to press the Ctrl button at any time to highlight the location of the pointer. It’s handy if you have any vision difficulties.
Mouse Settings in Windows
Wheel
The “Wheel” tab is all about your mouse’s scroll wheel. The options in the “Vertical Scrolling” group let you control what happens when you scroll your mouse wheel while looking at long pages. By default, when you scroll your mouse wheel one “click” it scrolls three lines of text. You can change that value here, or even set the wheel to move a whole screen of text at a time.
Mouse Settings in Windows
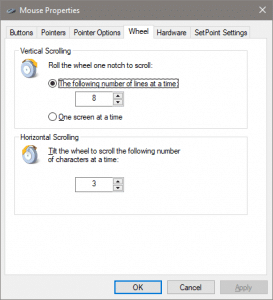
The options in the “Horizontal Scrolling” section control what happens when you to rock your scroll wheel side to side (assuming your mouse supports that). By default, pressing your scroll wheel to the side moves the page horizontally by three characters. You can adjust that value here.
Mouse Settings in Windows
Hardware
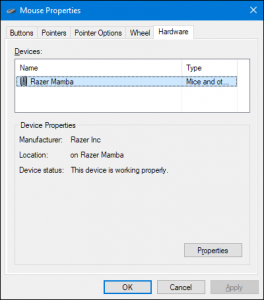
The “Hardware” tab lets you view the properties of the mouse or mice connected to your computer. It’s only necessary if you’re troubleshooting your hardware.
Configure Accessibility Settings
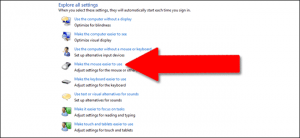
There are also a number of mouse settings that you can configure through your PC’s accessibility settings. Tough these settings are more aimed at making the mouse easier to use for people with disabilities, anyone might find a few useful options here.
Back in the main “Control Panel” window, click the “Ease of Access Center” link and, in the next window, click the “Make the mouse easier to use” option.
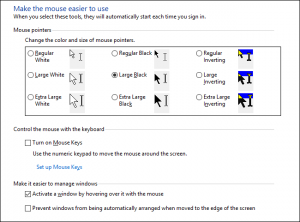
The “Make the mouse easier to use” window contains a number of useful settings.
Mouse Pointers
This section is a smaller, more focused version of the “Pointers” tab in the full mouse settings menu, offering the primary white, black, and inverted cursors in three sizes.
Mouse Keys
The “Turn on Mouse Keys” option in this section lets you use the 10-key number pad on full-sized keyboard to move the cursor. It’s only a practical option if you can’t use any mouse or pointing device. On most laptops (which lack the larger layout with a right-hand numeral pad) it won’t be possible to use this feature.
Make it Easier to Manage Windows
The “Activate a window by hovering over it with the mouse” option is quite useful if you manage multiple windows. It lets you switch Windows’ focus to a specific application without clicking on the app’s window. You just move the pointer to the right area. A small time delay keeps you from accidentally activating one window while moving over it to get to another.
Enabling the “Prevent windows from being automatically arranged” option disables the automatic “snap” window resizing in Windows 8 and Windows 10. It’s a popular option for those who don’t like the new-style interface tweaks in later OS releases.
Check Out Third-Party Mouse Tools
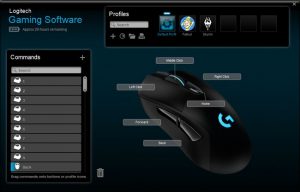
If you use a mouse from Logitech—or another supplier like Razer or Corsair—it probably came with software that runs on top of Windows to control those specific devices. The settings in these third-party applications override the default mouse settings in Windows. Consult your user manual or the manufacturer’s online help section for guidance on these specific programs.
Mouse Settings in Windows, mouse settings windows 10, mouse settings windows 8, how to change mouse click settings in windows 7,how to reset mouse settings in windows 10, mouse settings mac, how to slow down mouse speed windows 10, change mouse scroll speed windows 10, windows 10 mouse sensitivity problems
Share
Discover more from Applygist Tech News
Subscribe to get the latest posts sent to your email.
